Admin Feature
Editing the website is an account owner-level permission. If you don't see this option, contact your account owner to enable these permissions for you.
Adding your agent photo to your website helps build trust with potential clients and makes your site feel more personal. While your bio page is a great place to display your photo, you can also add it to other prominent locations on your Real Geeks website for better visibility.
Recommended Locations
- Website Sidebar – Keeps your photo visible as users navigate your site.
- Website Footer – Displays your image at the bottom of every page for consistent branding.
Adding Featured Agent Photos to the Home Page Sidebar
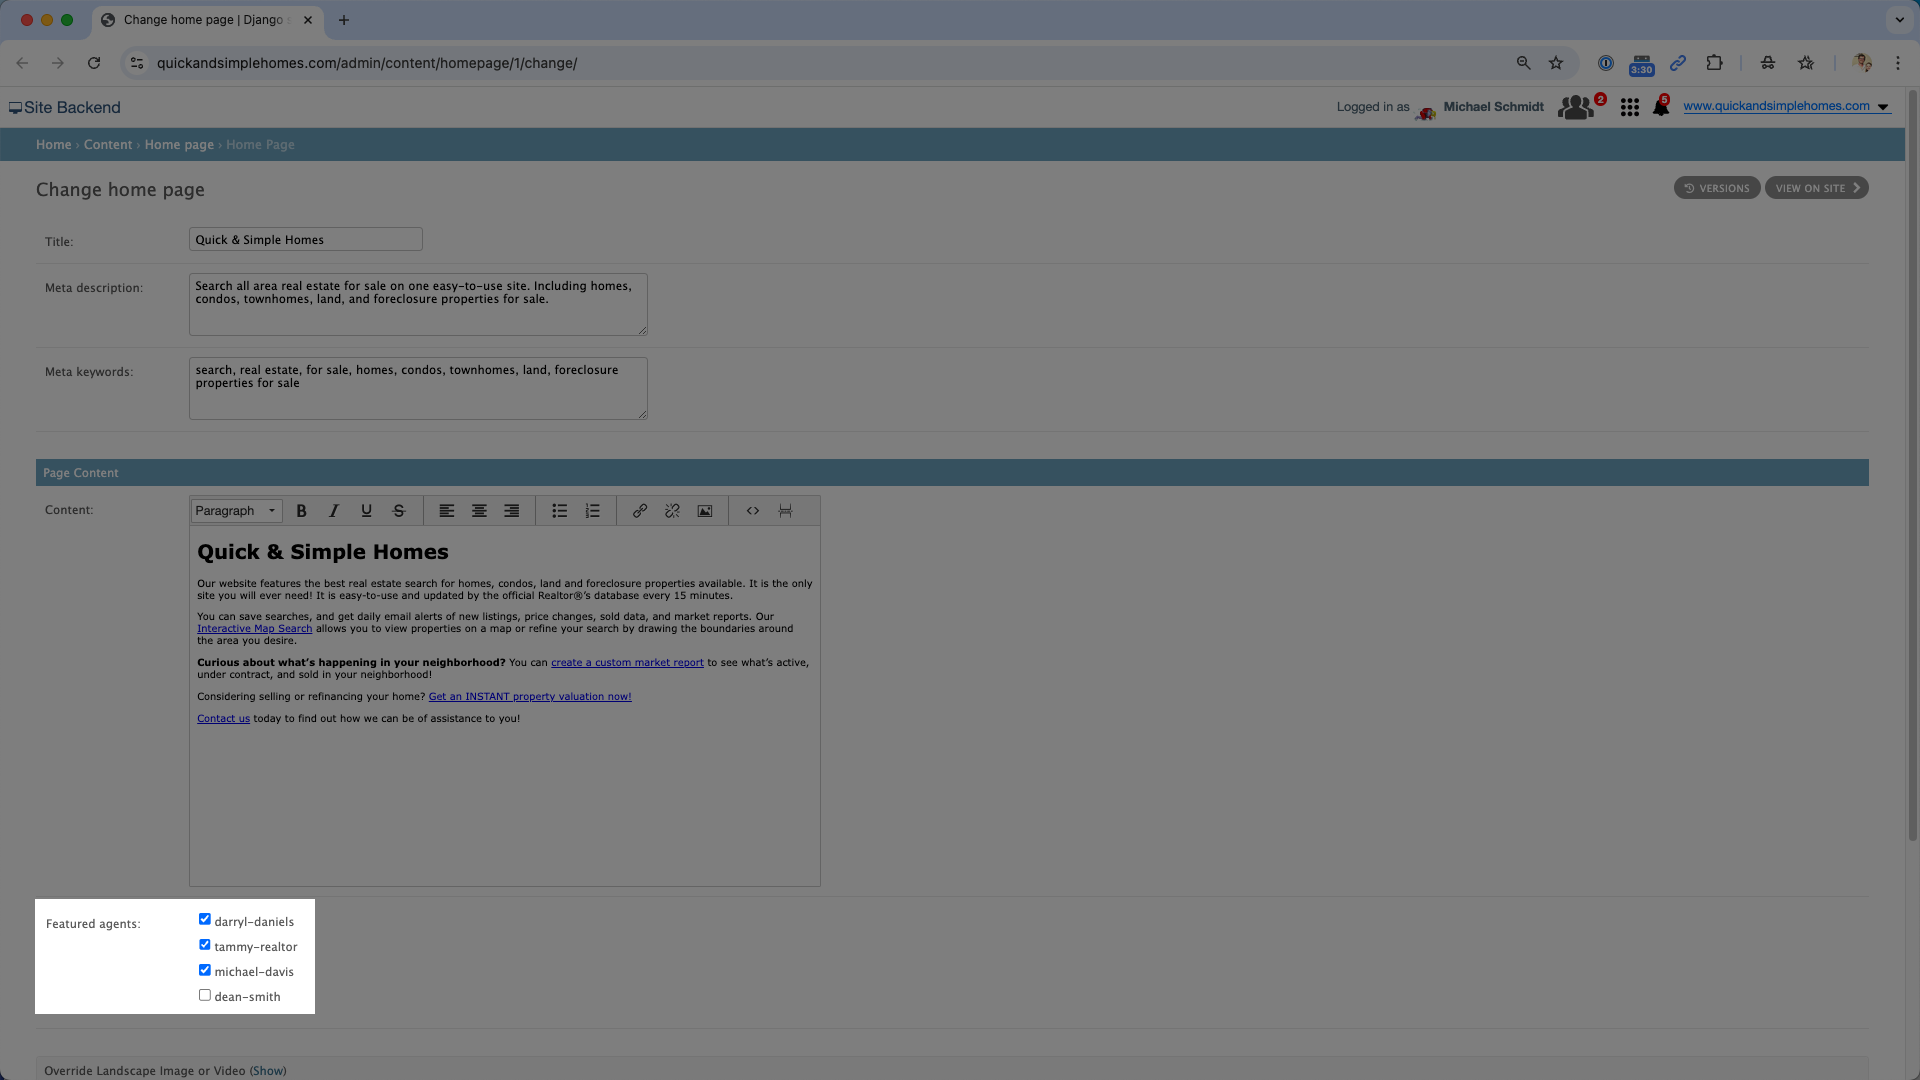
If your website uses the Anna or Anna-Modern design template, you can enable the Featured Agent Tool to display selected agents on the homepage.
Requirements
- Your website must use the Anna or Anna-Modern design template.
- Agent pages must be set to the Agent Detail Page template.
To Enable the Featured Agent Tool:
- Go to your website backend by adding /admin to the end of your website domain (e.g., www.yourwebsite.com/admin).
- Click Home Page from the menu.
- Select your Featured Agents from the available options.

Adding Your Agent Photo to the Sidebar Manually
Adding your photo to the sidebar ensures it stays visible as visitors browse your website.
- Go to your website backend by adding /admin to the end of your website domain (www.website.com/admin)
- Click Sidebar
- Select Default Sidebar
- Scroll to the last available Sidebar Item and set it to Custom Content.
- Click the Insert/Edit Image icon

- Upload your photo:
- Click the blue magnifying glass icon.

- Press the green Upload button in the top-right corner
- Click the blue magnifying glass icon.
- Click Select Files to upload your image.
- Click the Insert button next to your photo.
- SAVE to apply the changes.
Adding Your Agent Photo to the Footer

The footer appears at the bottom of every page, making it a great place to add your agent photo for extra exposure.
- Go to your website backend by adding /admin to the end of your website domain (www.website.com/admin)
- Click Footer
- Select Default Footer
- Place your cursor in the location you want the image, then click Insert/Edit Image
- Upload your photo:
- Click the blue magnifying glass icon.
- Press the green Upload button in the top-right corner
- Click the blue magnifying glass icon.
- Click Select Files to upload your image.
- Click the Insert button next to your photo.
- SAVE to apply the changes.
Why Your Agent Photo Should Not Be Added to the Header Image
The header image at the top of your website is designed to be a large, eye-catching background image that represents your brand. It is not intended for agent photos, text, or logos.
Why?
- Cropping Issues – The header image automatically adjusts based on screen size and device, which can cause parts of the image (including your face) to be cropped unexpectedly.
- Best Use of Space – A high-quality, generic image (such as a local landscape or real estate-related background) ensures your site looks professional and visually appealing across all devices.
For a polished look, it’s best to keep your agent photo in your sidebar, footer, or bio page where it will display clearly.