Running Facebook ads to your Real Geeks website requires a few setup steps inside Meta. These steps are required by Facebook policy and must be completed before you can run ads in Ads Manager or through the Real Geeks Facebook Ads Tool. Once this setup is finished, you will not need to repeat it, and you will be able to create ads quickly and start generating leads.
Below is an outline of the steps you need to complete to set up your business account.
Steps to Set Up Your Business Account
Create Your Meta Business Portfolio
A business portfolio is the central place where you organize your Facebook Page, ad account, website domain, and tracking tools. This must be completed before you can run ads. You only need a personal Facebook profile to create one.
Steps
-
Go to business.facebook.com in a desktop browser.
- If you are already logged in to Facebook, you will go directly to the setup screen.
- If not, click Log in with Facebook.
-
Click Create a business portfolio.
-
Enter your business details.
-
Click Submit or Create.
- Business portfolio name
- Your name
- Business email
-
Open the confirmation email from Meta and verify your email address.
Your business portfolio is now ready for the next steps.
Add or Create Your Facebook Page
You must connect a Facebook Page in order to run ads. You can add an existing Page or create a new one from inside your portfolio.
Add an existing Facebook Page
-
Go to the Meta Business Settings page
-
Under Accounts, click Pages.
-
Click Add.

-
Select Add an existing Facebook Page.
-
Enter the Page name or URL.

-
Click Next.
-
Agree to the terms.
-
Click Add Page.
-
Click Done.

Create a new Page
In the same menu, select Create a new Facebook Page and follow the prompts.
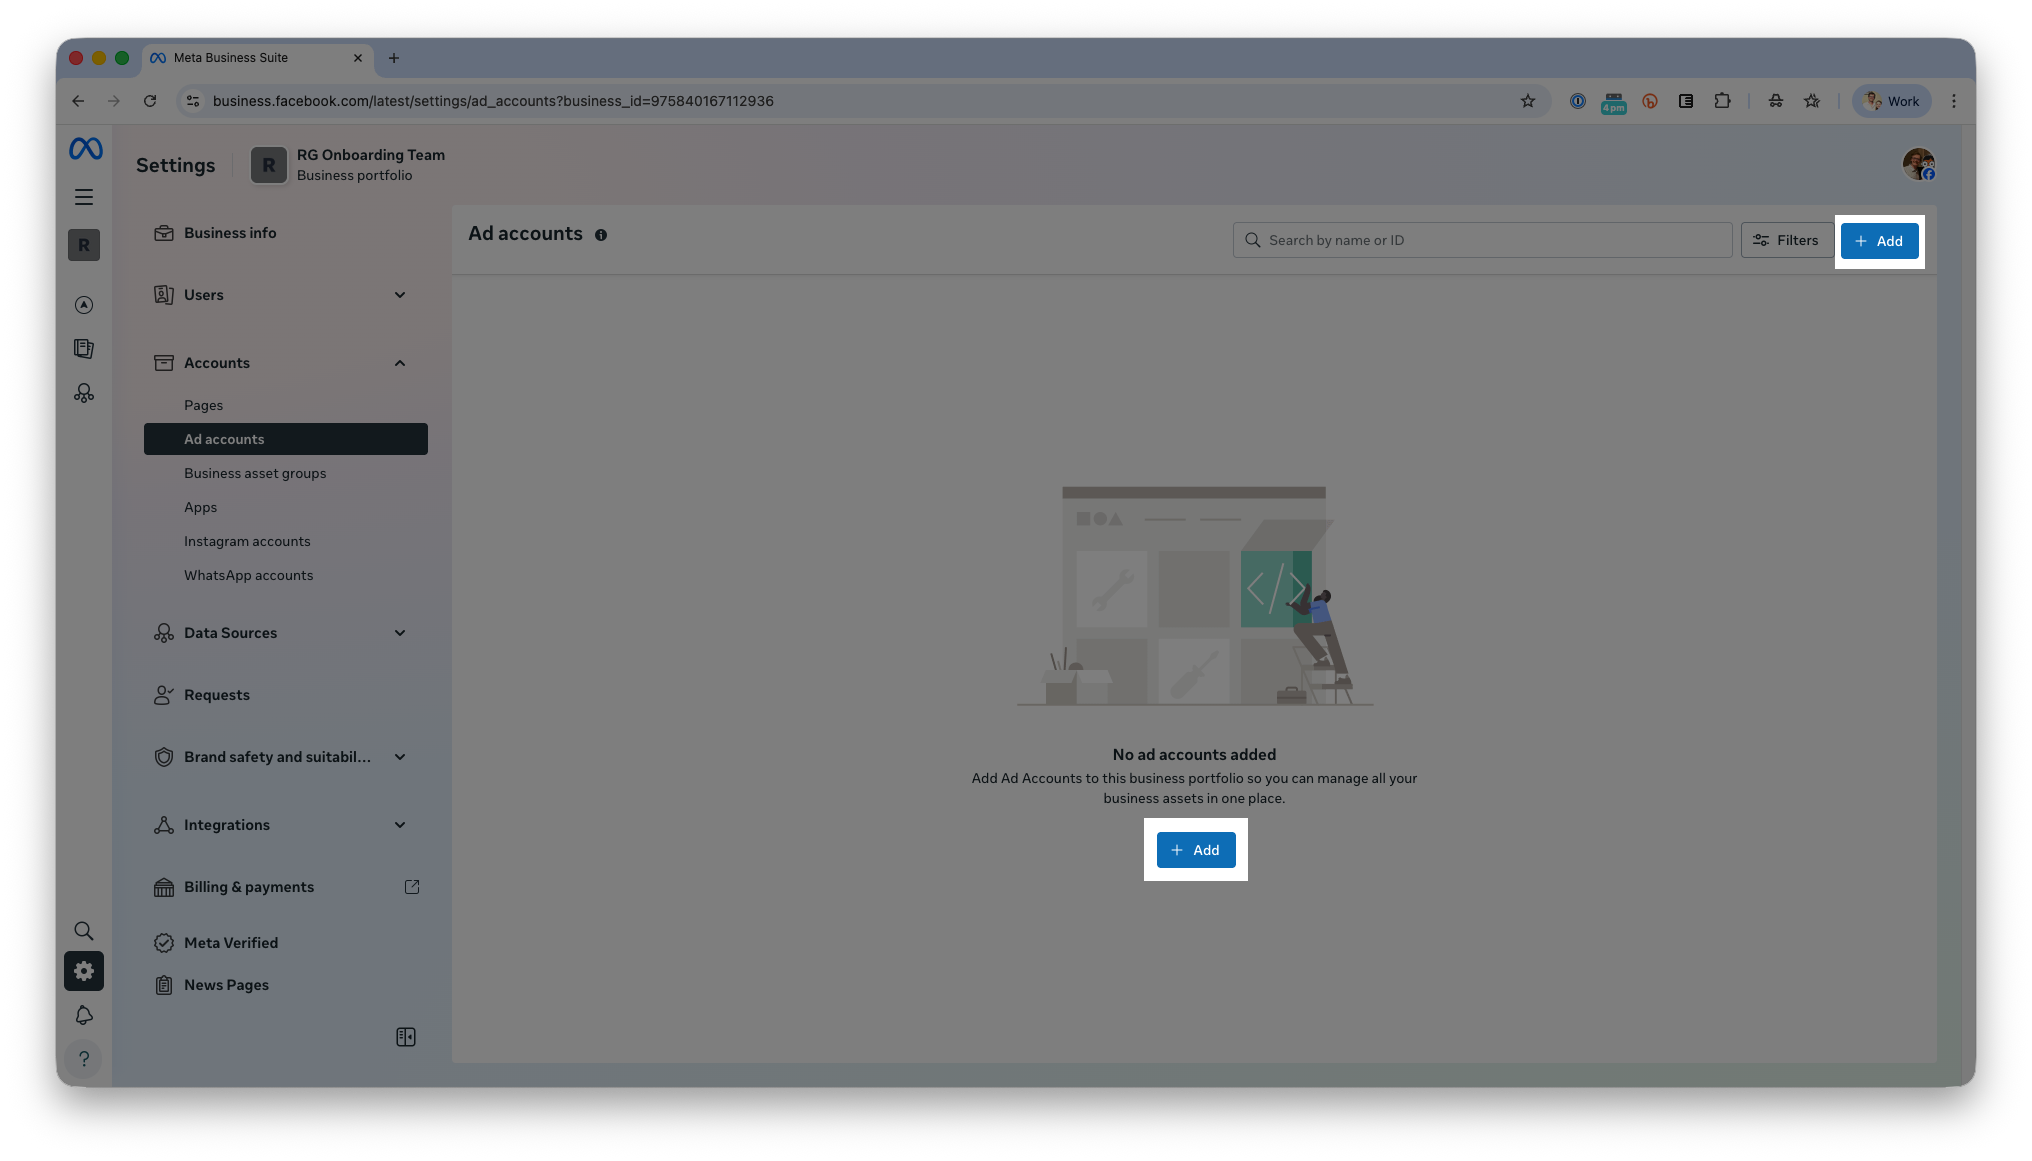
Add or Create Your Ad Account
Your ad account is where you create your campaigns and manage billing. You can create a new ad account or claim an existing one.
Create a new ad account
-
Go to the Meta Business Settings page
-
Click Accounts, then Ad accounts.
-
Click the Add dropdown.

-
Select Create a new ad account.
-
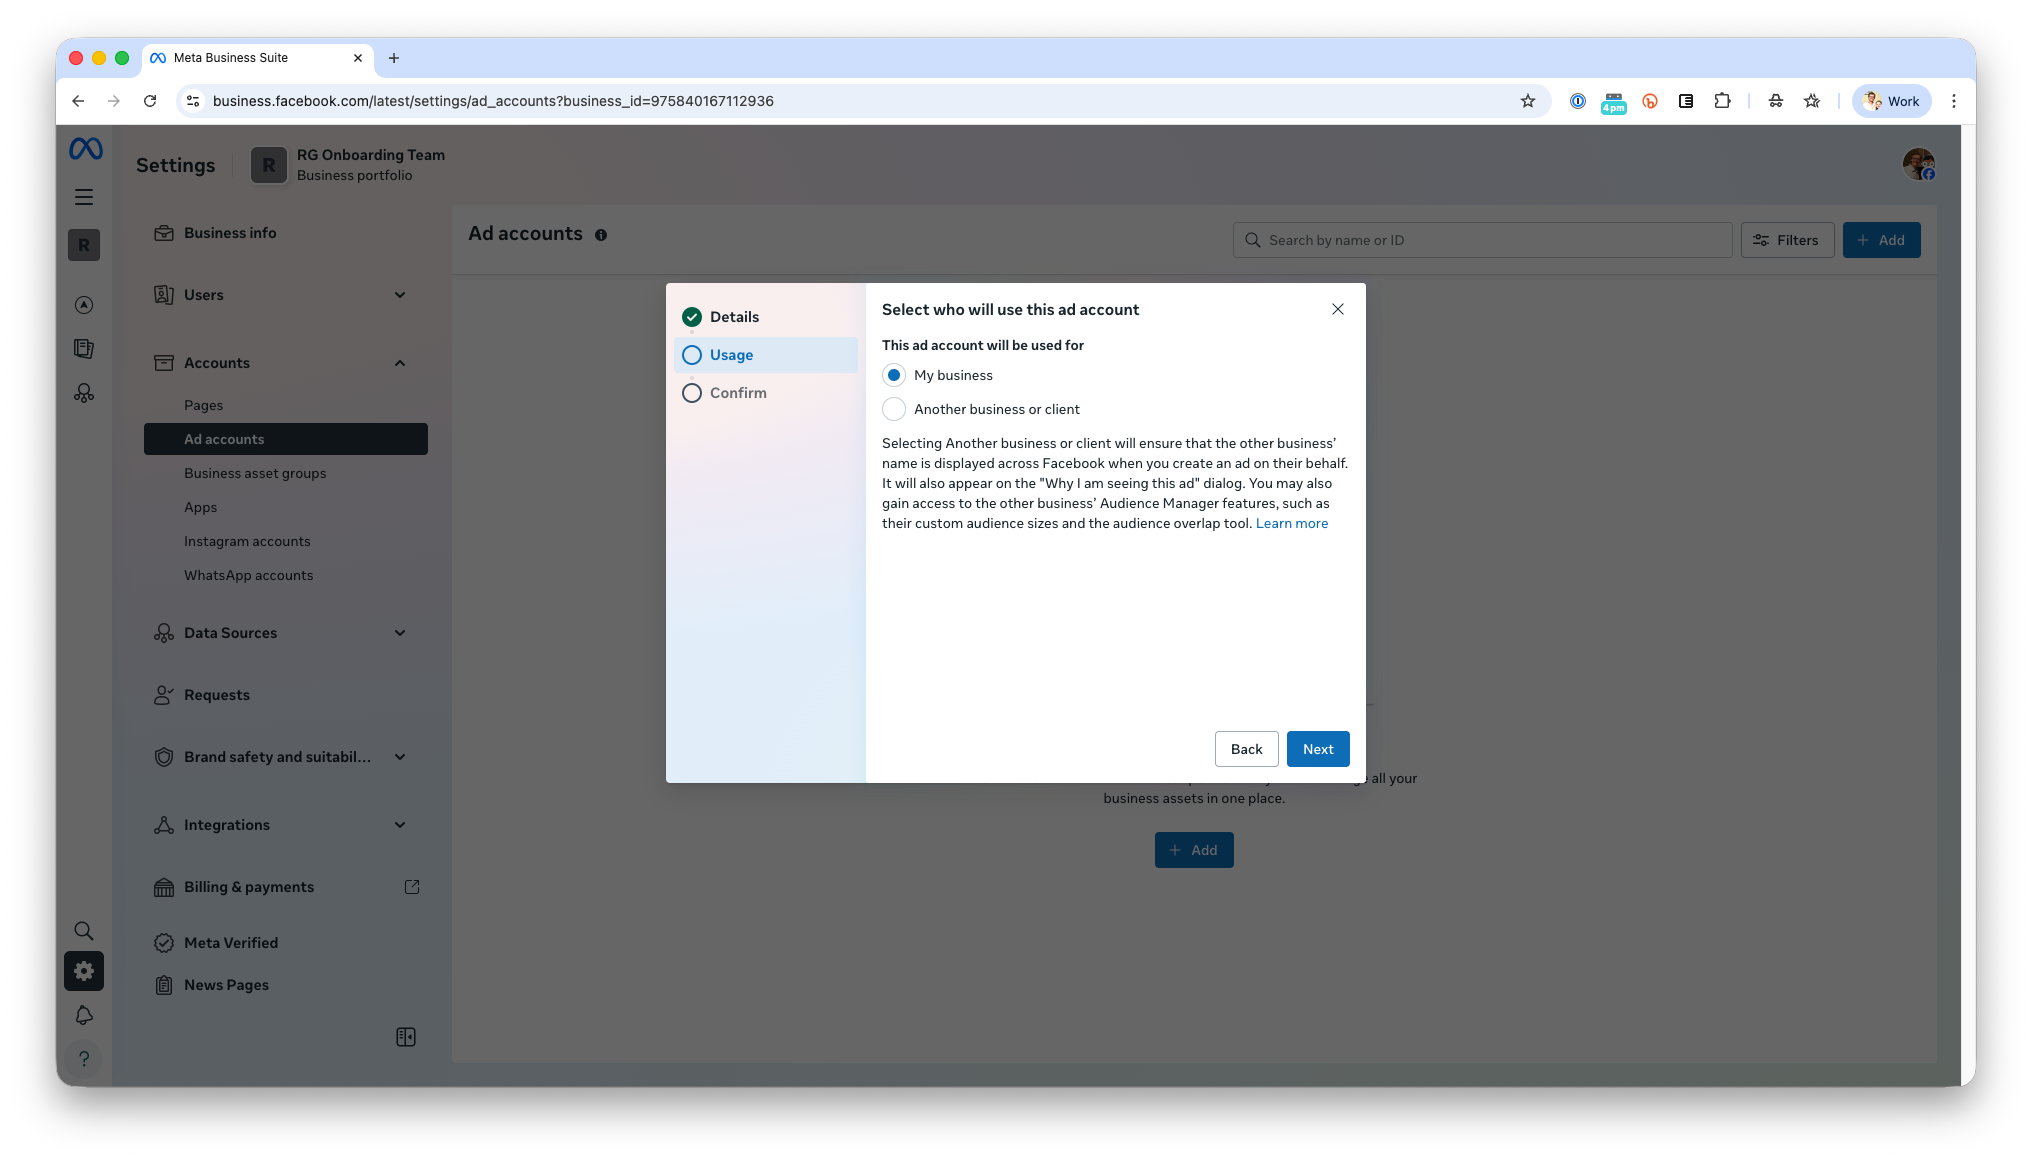
Enter the ad account name, time zone, and currency.

-
Click Next.
-
Select My Business to indicate that your organization will be managing this ad account

-
Confirm your selection and agree to the terms.
-
Click Create ad account.
-
Add payment info now or click Done to add it later.

Claim an existing ad account
-
Go to the Meta Business Settings page
-
Click Accounts, then Ad accounts.
-
Click the Add dropdown.
-
Select Add an existing ad account.

-
Enter the ad account ID.
-
Confirm the request and agree to the terms.
-
Click Claim ad account.
If you do not own the ad account, the current owner must approve your request.
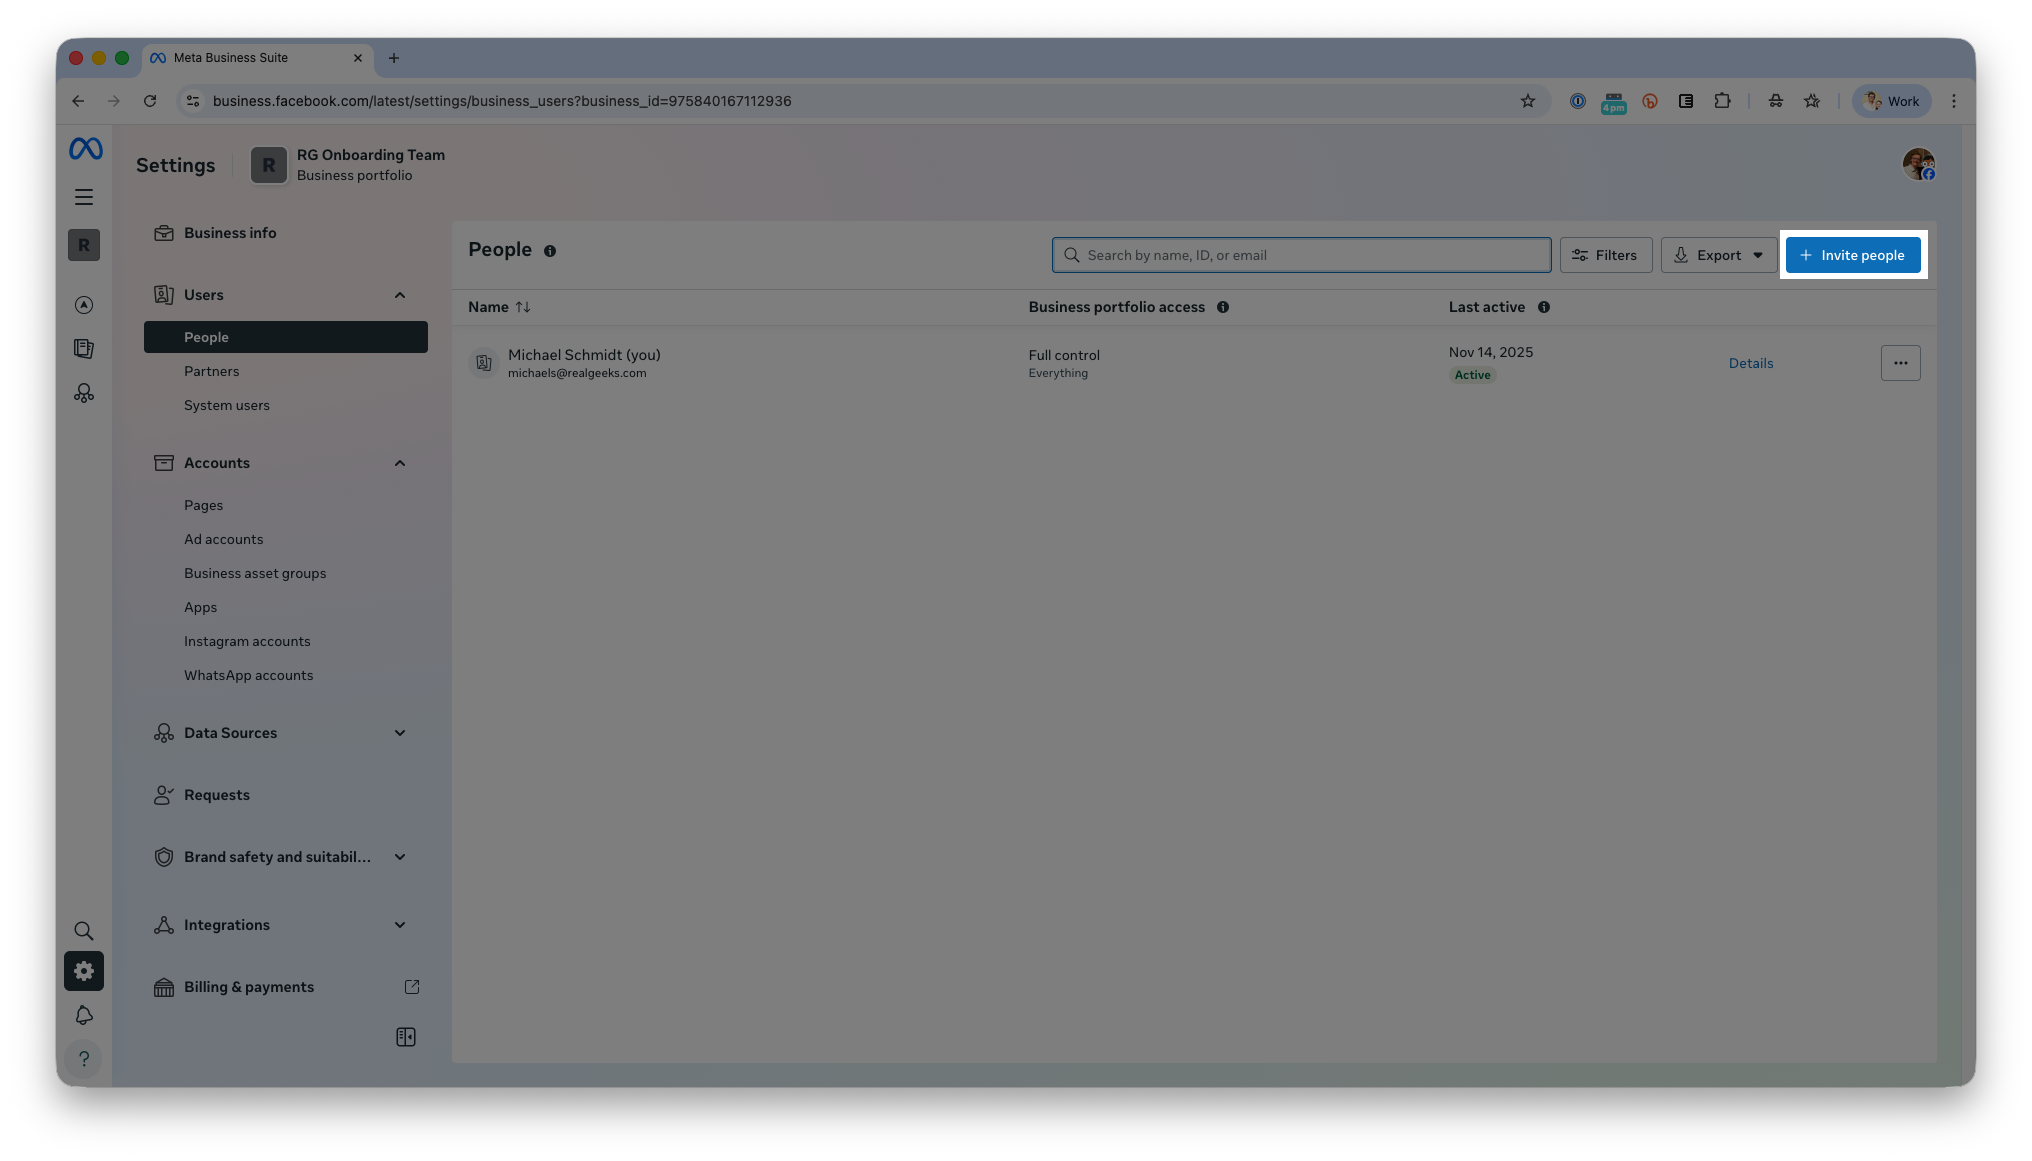
Add People to Your Business Portfolio
If you work with a team member or admin, you can invite them to your portfolio so they can help manage ads and assets.
Steps
-
Go to the Meta Business Settings page
-
Under Users, Click People in the left menu.
-
If you do not see it, your permission level may be limited.
-
-
Click Invite people.

-
Enter the email address that matches the person’s Facebook account.
-
Click Next.
-
Assign their their portfolio permissions.
- Full Control or Partial Access
-
Click Next.
-
Under Select Assets, select the checkbox next to your page name

-
Select the person's access levels

-
Click Next.
-
Click Invite with (1) asset


The person must accept the invitation. It may take a few days for all features to become available to them.
Assign Assets to Yourself and Your Team
In this step, you must give yourself permission to access the Facebook Page, ad account, and tracking tools you added to your business portfolio. Meta requires you to assign these assets manually, even if you are the one who created them. This is also required in order for the Real Geeks Facebook Ads Tool to work.
Please Note
You must assign business assets to yourself in this section or the Real Geeks Facebook Ads Tool will not work. Assign the following items to yourself:
-
Your Facebook Page
-
Your Ad Account
-
Your Dataset or Pixel
Without access to all three assets, the tool cannot publish or manage ads.
Steps
-
In the Meta Business Settings, go to Users, then People.
-
Click the
...menu -
Click Assign assets.

-
Select your Page, ad account, and dataset or pixel.
-
Choose full access.
-
Click Save or Assign assets.

Repeat this for any teammates who need access.
Verify Your Website Domain
Domain verification confirms that you own your website. Meta requires this before ads can run correctly.
Steps
-
Go to the Meta Business Settings page
-
Under Brand safety and suitability, click Domains.

-
Click Add.
- Select Create a Domain
- Enter your root domain only (do not add
www)- Example:
website.com
- Example:
-
Click Add

-
Select the Meta tag method.
-
Copy the entire meta tag that appears.
- Example:
<meta name="facebook-domain-verification" content="2v13j9ajobay3l7ntnuqfasntice08" />
- Example:
-
Email the meta tag to support@realgeeks.com and request for it to be added to your site.
-
Once Real Geeks confirms the tag is installed, return to the Domains page.
-
Select your domain and click Verify.
Your domain will show as verified when Meta detects the tag.
Set Up Your Tracking Pixel
The pixel tracks activity on your Real Geeks website, including page views, listing views, and lead activity. You will create a dataset, then create the pixel code that Real Geeks will install for you.
1. Create Your Dataset
-
In the Meta Business Settings, go to Data sources.
-
Click Datasets.
-
Click Add.

-
Enter a simple dataset name.
Example: Quick Realty Team Pixel Data -
Click Create.

2. Create Your Facebook Pixel
-
Go to Meta Events Manager
-
Click Datasets.
-
Click Set up Meta Pixel.

-
Choose Install code manually.
-
Click Copy code.
3. Send your pixel to Real Geeks
-
Start an email to support@realgeeks.com.
-
Paste your pixel code in the email.
-
Include your website URL.
-
Send the message.
A Real Geeks team member will install the pixel on your website. This usually takes one or two business days. After it is installed, you can confirm activity in Events Manager.
Congratulations! Here are Some Next Steps!
Once you complete every step in this guide, your Page, ad account, domain, dataset, and pixel will be fully connected and ready for advertising. You can now begin creating Facebook ads that send traffic and leads to your Real Geeks website.
For a quick way to get started, consider using the Real Geeks Facebook Ads Tool. It helps you create real estate ads quickly and connects directly to your Real Geeks website.
If you need help, contact Real Geeks Support at support@realgeeks.com or call 844-311-4969.