.svg)
Admin Only
These actions must be completed by the Site Owner only. No action is required from other users.
Part of the process for using the Facebook tool to generate ads or create posts is confirming your ownership of your business page and your connection to the business you are promoting. This helps Meta verify that you’re a legitimate representative of the brand, protects your page from unauthorized use, and ensures your ads and posts are properly attributed to your business.
Part 1: Verify Your Domain with Meta
-
Go to the Meta Business Portfolio - Domains page
-
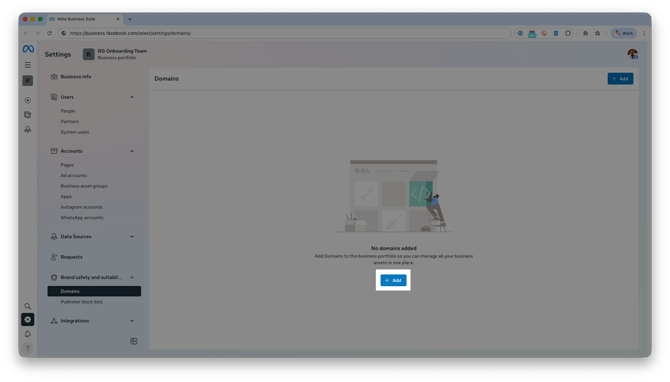
Click Add
-
Click Create a domain
-
Enter your website address (without using
www. Example: yourdomain.com)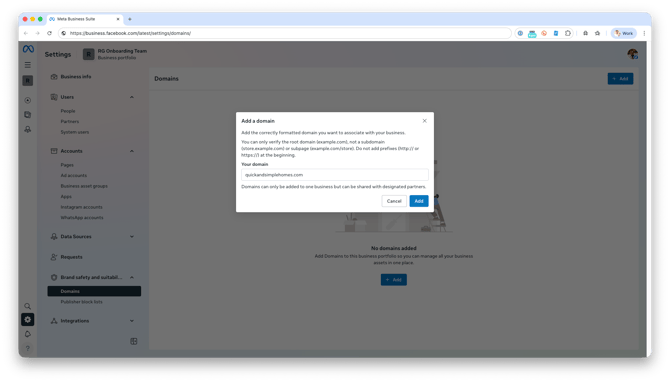
-
Click Add
-
Under the first step of the Add a meta-tag instructions, copy the provided code (this would start with
<meta name=)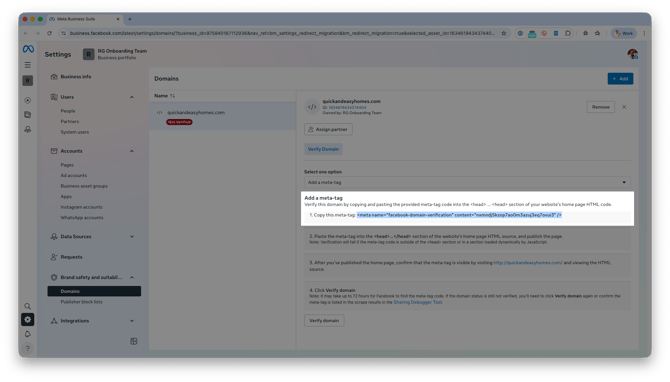
-
Email the code to support@realgeeks.com, then call 844-311-4969 to confirm that support has received it and added it to your website.
-
Click Verify domain
Part 2: Connect your business page to your domain
After verifying your domain with Meta, connect your Facebook Business Page to that domain to further establish your brand identity with Meta. Follow the steps below.
After Verifying your Domain:
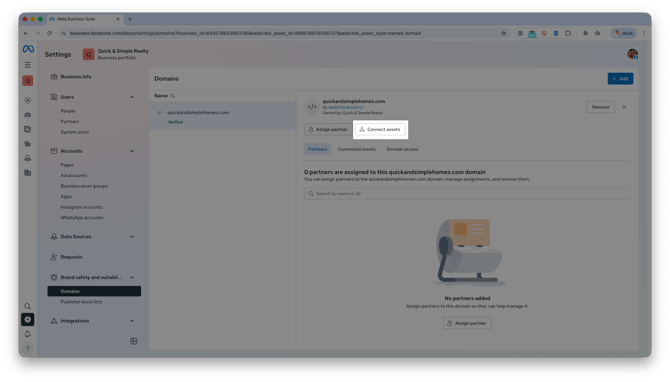
Return to the Meta Business Portfolio – Domains page and click on your verified domain.
Click Connect Assets-
Select Other business assets
-
Select your business page, then click Add
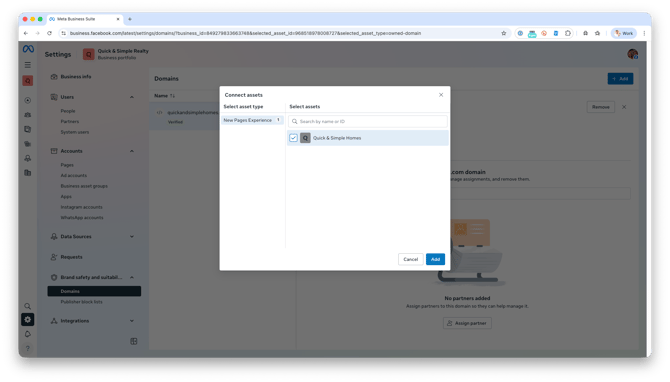
You may be prompted to enter a 2-Factor Authentication code. This is typically sent to your phone, but click Need another way to authenticate? to find other methods to verify this.