Admin Feature
Editing the website is an account owner-level permission. If you don't see this option, contact your account owner to enable these permissions for you.
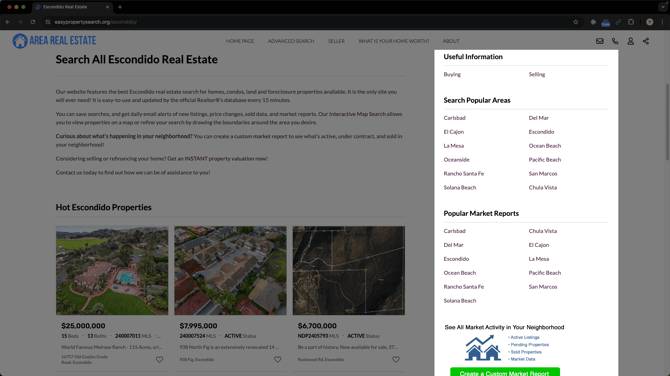
Sidebars are a flexible way to display helpful information next to your page content. For real estate websites, they make it easier for visitors to explore listings, neighborhoods, and resources without losing their place, helping you keep attention longer and guide leads toward their next step.
Need to Know
-
Sidebars appear in the side area of the page next to your main content
-
Sidebars can include links, custom content, blog posts, images, and videos
-
A default sidebar appears on most pages, with the option to assign custom sidebars per page
-
Page-specific sidebars improve navigation and keep content relevant to the visitor
Table of Contents
What is a Sidebar?
A sidebar is a side area of the page that displays supporting content next to the main page content. Sidebars help visitors quickly find related pages, explore neighborhoods, view recent blog posts, or access helpful resources without leaving the page they are on.
Common sidebar uses include:
-
Links to neighborhood or city pages
-
Recent blog posts or market updates
-
Contact details or short agent bios
-
Images, videos, or promotional content
Creating and Updating a Sidebar
Creating a custom sidebar lets you show specific resources, links, and pages that are most relevant to the page a visitor is viewing. This helps guide visitors to related content, improves navigation, and keeps them engaged longer.
Step-by-Step Instructions
-
Open your website editor by adding /admin to the end of your website address (e.g. www.yourwebsite.com/admin)
-
Click Sidebars
-
Select Add Sidebar to create a new one, or select an existing sidebar to edit

-
Enter or update the sidebar name so it clearly reflects its purpose
-
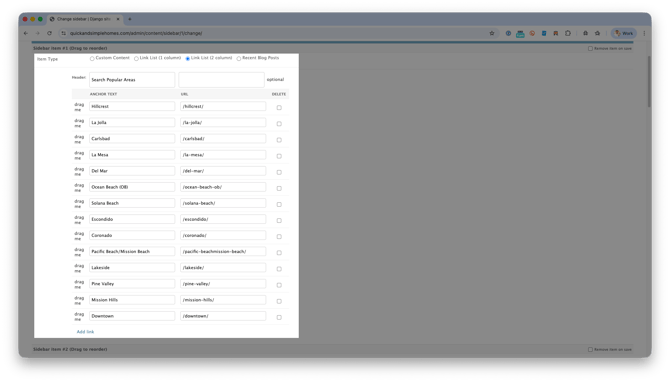
After opening a sidebar, add content using one or more sidebar items:
-
Link Lists to guide visitors to related pages
-
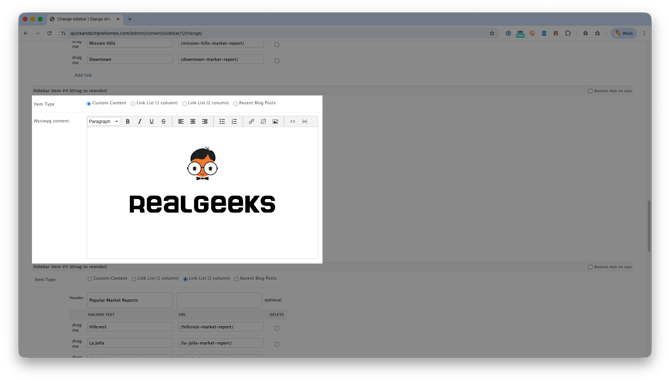
Custom Content for text, images, or videos
-
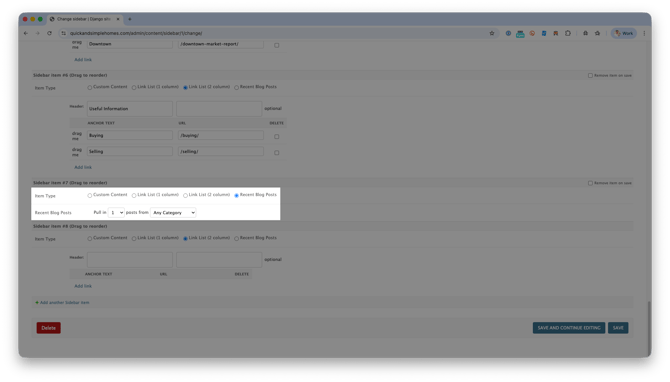
Recent Blog Posts to surface fresh content automatically
-
-
Click Save
Tip
Keep sidebars focused. Choose items that directly support the page goal.
Assigning a Sidebar to a Page
Custom sidebars do not appear automatically. You must manually assign a sidebar to a specific page to ensure the right resources and links display for that page’s content.
Step-by-Step Instructions
-
Open the Content Page or Area Page you want to update
-
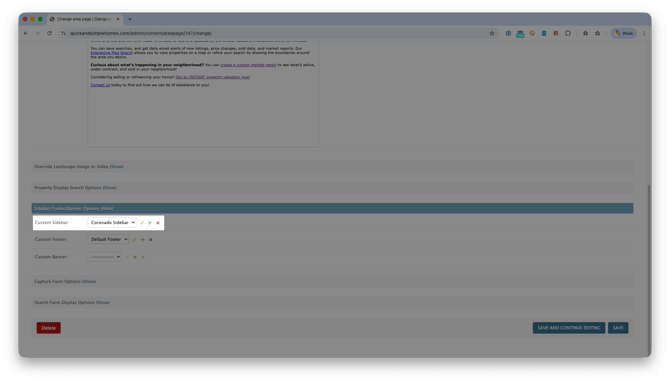
Scroll to the Sidebar/Footer/Banner section and click Show
-
Select the sidebar you want to use
-
Click Save
How Custom Sidebars Increase Website Engagement
Building additional sidebars allows you to support your page content with resources that are directly related to what a visitor is viewing. Instead of showing the same links everywhere, you can create sidebars that surface relevant pages, tools, and information that add value to each page.
Using multiple sidebars helps you:
-
Highlight related pages and resources that support the main content
-
Guide visitors to deeper, more relevant areas of your website
-
Increase engagement by encouraging additional page views
-
Keep visitors focused on topics they’re already interested in
Examples of when to build a new sidebar:
-
Neighborhood pages that link to nearby areas or similar communities
-
Local resource pages that highlight schools, attractions, or businesses
-
Blog pages that promote related posts or categories
Strategic use of multiple sidebars helps visitors explore your site more easily while reinforcing your expertise in the topics they care about.
Need Help?
- Call us at 844-311-4969 (Mon–Fri, 8 AM–8 PM CST)
- Email support@realgeeks.com
- Visit Real Geeks University for free video courses
- Join the Real Geeks Mastermind Group on Facebook for peer tips and best practices