Admin Feature
This integration can support multiple accounts, but defer to the Account Owner/Admin before completing these steps.
Integrating your Real Geeks CRM with Facebook Lead Ads allows you to capture leads directly from your Facebook campaigns and have them flow seamlessly into your Real Geeks account. This guide walks you through the process of connecting your accounts, creating a Facebook Lead Ad, and formatting the lead source for better tracking and organization.
Table of Contents
How to Integrate Real Geeks with Facebook Lead Ads
Integrating your Real Geeks CRM with Facebook Lead Ads allows you to capture lead information from your Facebook campaigns directly into your CRM. This connection streamlines your lead generation process, ensures no leads are missed, and makes it easier to track and nurture new prospects.
-
Go to the Real Geeks CRM Integrations page
-
Click Setup next to Facebook Lead Ads
-
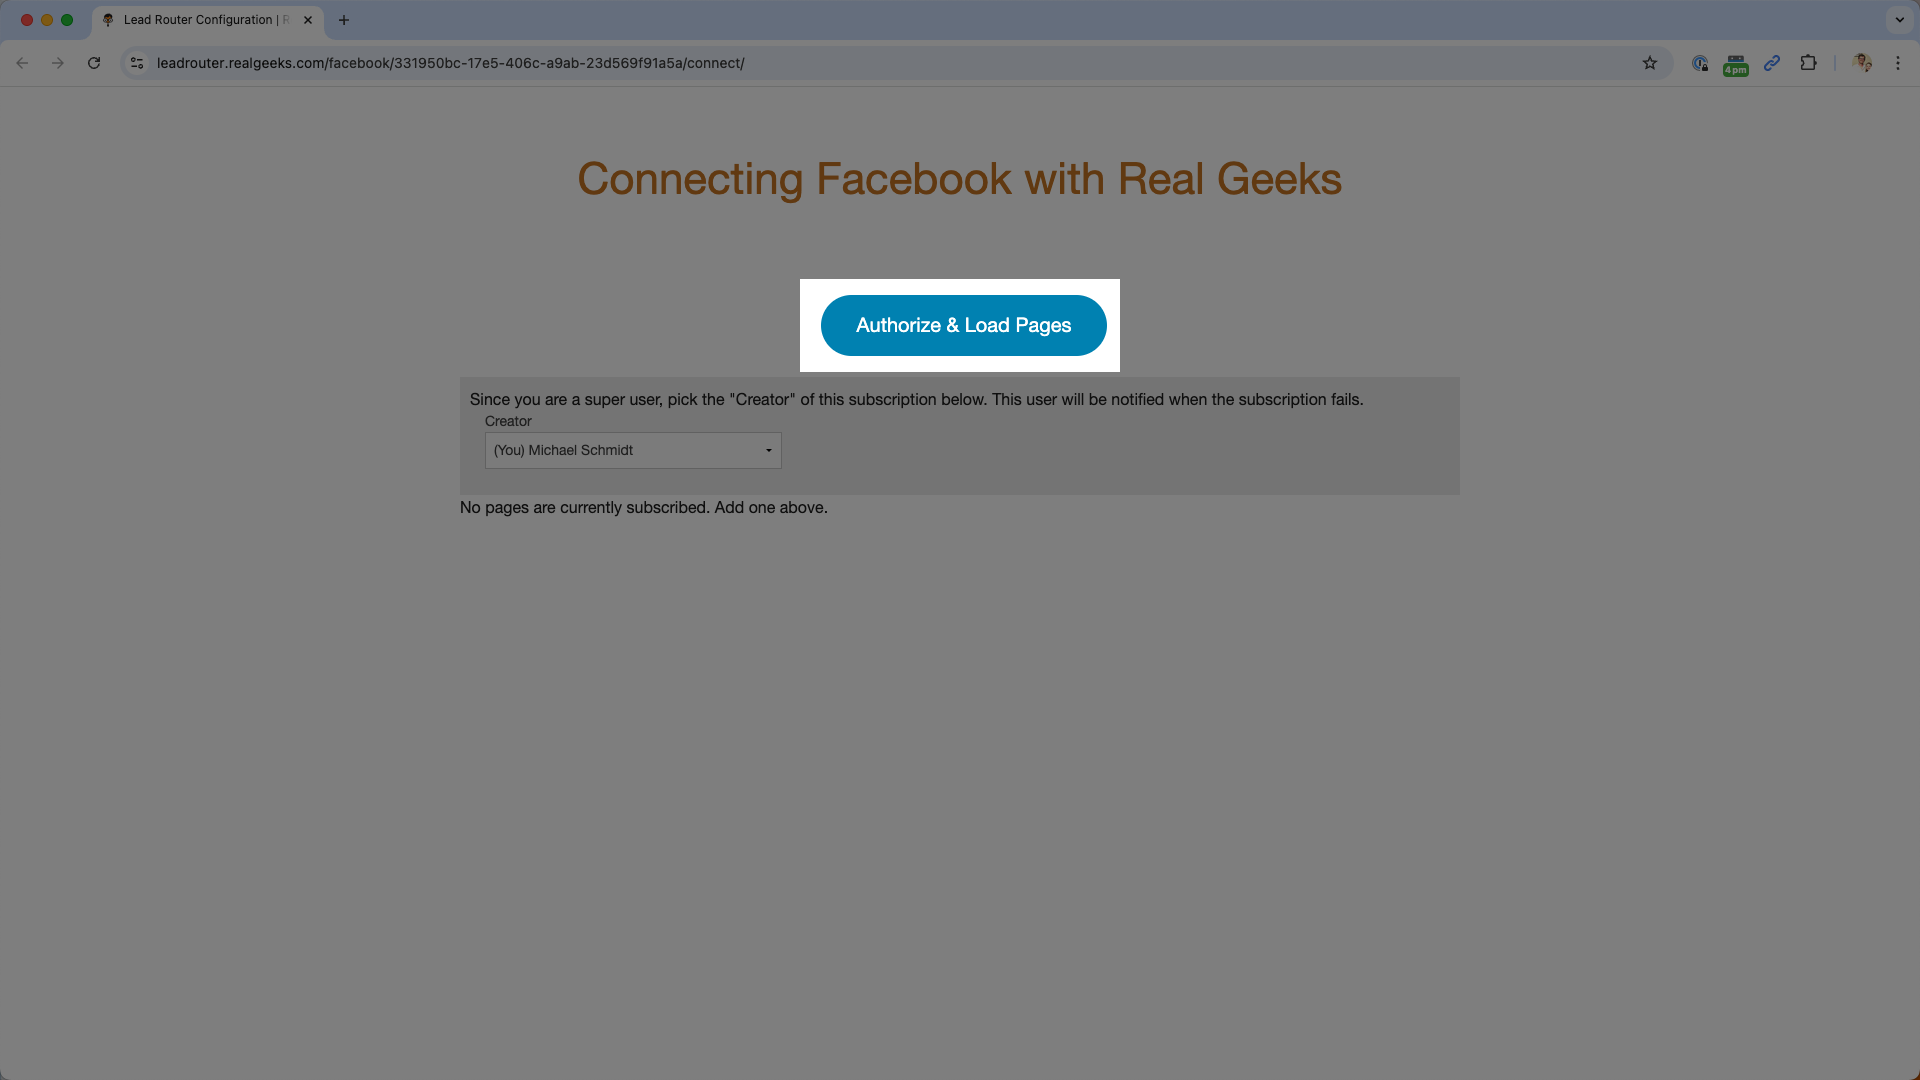
Select Authorize & Load Pages

-
Follow the prompted steps to log in to your Facebook account
-
Select your facebook business page name in the Page Name field
-
Use the Assign To menu to select the agent the leads that sign up through your lead ads will be automatically assigned to in the CRM

-
Select the Lead Type that your leads will be assigned in the CRM
-
Click Connect

How to Create a Facebook Lead Ad - Facebook Tool
When creating Facebook Lead Ads, we strongly encourage the use of the Real Geeks Facebook Tool. This approach streamlines the entire process, seamlessly integrates with your CRM, and offers features that enhance customization and tracking of your ads for optimal performance.
To create Lead Ads using the Facebook Tool, refer to the Facebook Tool Overview guide for detailed instructions, troubleshooting tips, and best practices.
Alternatively, you can follow the quick step-by-step instructions below:
-
Go to the Facebook Tool
-
Click New Ad/Post
-
Select your Ad Type
-
Enter the link to your website's content
-
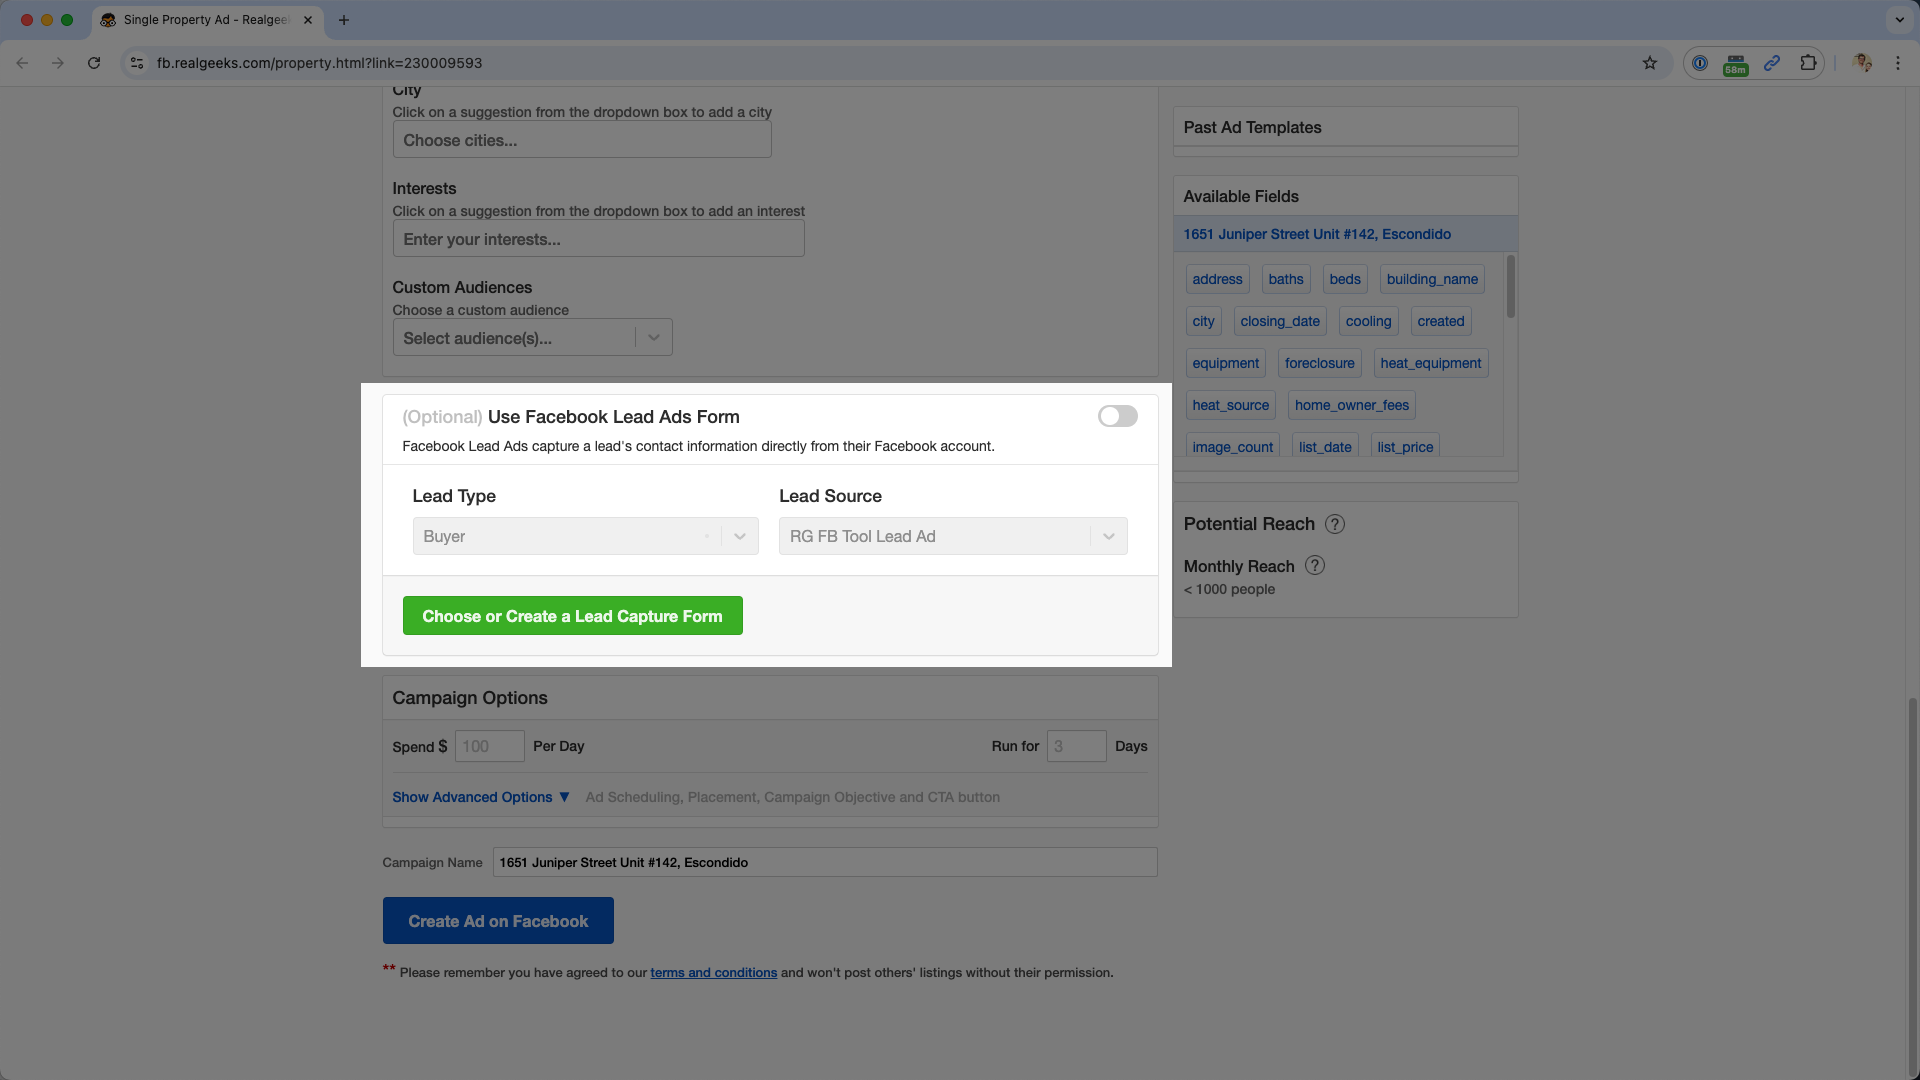
Enable the Use Facebook Lead Ad option

-
Assign a Lead Type and Source to incoming leads - These can be customized in the CRM's Customization page.
-
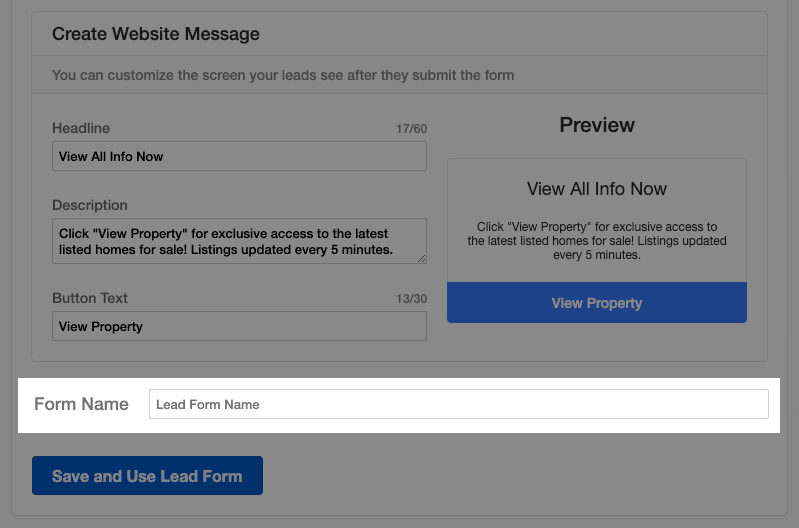
Personalize the form with a custom welcome message, call to action, and field requirements
-
Enter the Form Name and click Save and Use Lead Form

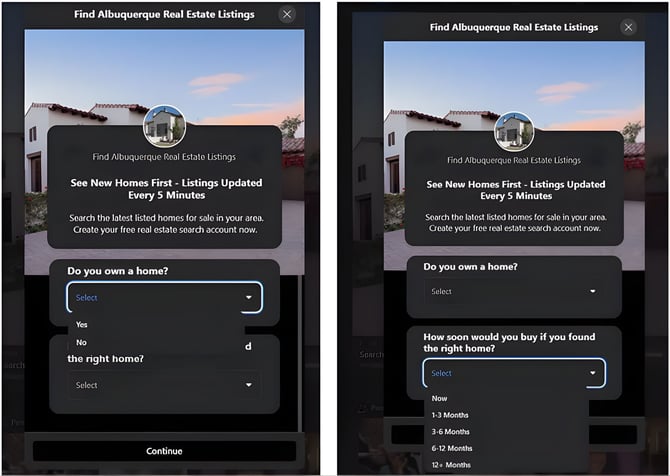
Facebook Lead Ad Form Example
When a lead clicks on the ad from facebook, they are provided a form to complete in facebook. Once the lead completes this facebook form, the contact information and details are submitted to Real Geeks