Admin Feature
Editing the website is an account owner-level permission. If you don't see this option, contact your account owner to enable these permissions for you.
Your website visuals play a major role in first impressions. Using the correct image, video, and logo sizes helps your Real Geeks website load quickly, display cleanly across devices, and maintain a professional look.
Need to Know
-
Header images and videos must match your website template to avoid cropping
-
Header videos must be MP4 files under 8 MB
-
Logos should be sized for clarity in the top navigation
-
High-resolution files improve appearance on desktop and mobile
Table of Contents
Add an Image to the Top of Your Website
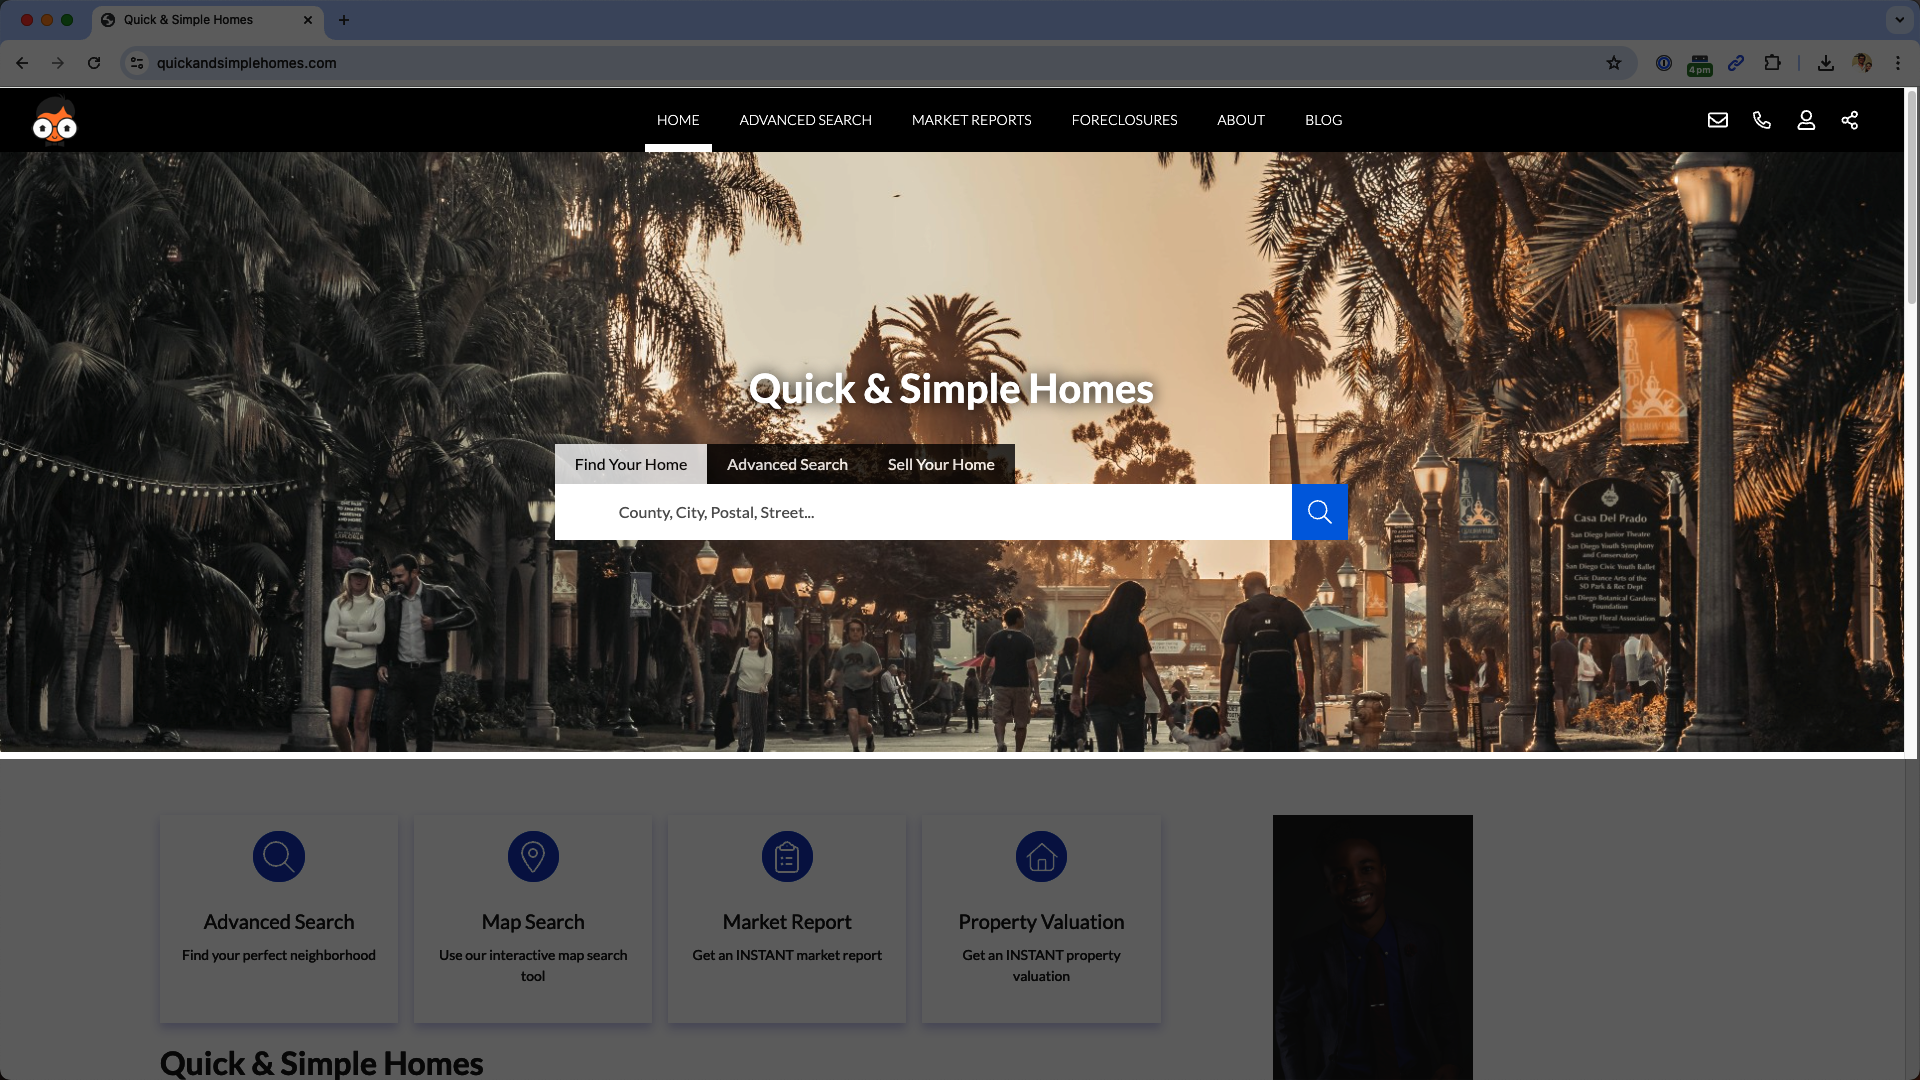
The image at the top of your website helps set the tone for your brand and gives visitors a quick sense of the local area you serve. Using the correct image size prevents cropping and keeps your site looking clean on all devices.
Recommended Image Sizes by Template
Use JPG or PNG image files for best results.
-
Miranda: 2200 x 720 pixels
-
Miranda Thin: 2200 x 550 pixels
-
Molly: 1100 x 720 pixels
-
Anna: 2200 x 600 pixels
-
Anna Modern: 2560 x 1440 pixels
Tips for Choosing an Image
-
Avoid faces, text, or logos that could be covered by the search bar or cut off on smaller screens
-
Use wide, horizontal images that fit the layout naturally
-
Choose scenes like neighborhoods, homes, or skylines to create a local feel and help visitors recognize the area you serve
-
Choose images with plenty of open space so the design and search bar don’t feel crowded
-
Free, high-quality images are available from Unsplash.com or Pexels.com if you don’t have your own photos
For more details, review the Add an Image to the Top of Your Website guide.
Add a Video to the Top of Your Website
A video at the top of your website can add subtle motion and make your site feel more modern. Keeping the video simple and lightweight ensures fast loading and a smooth experience for visitors.
Video Requirements
-
File format: MP4
-
Maximum file size: 8 MB
-
Video length is flexible as long as the file stays under 8 MB
Best Practices for Videos
-
Use calm, slow-moving footage like city views or neighborhood scenes to add motion without distraction
-
Avoid text, logos, or fast cuts that can feel busy or compete with the search bar
-
Keep the video subtle and background-focused so listings and navigation stay front and center
-
If your video file is too large, use a video compressor to reduce the file size, but avoid compressing the same video multiple times to prevent quality loss
-
Free, high-quality background videos can be found on Unsplash.com or Pexels.com
-
Test the video on desktop and mobile to make sure it loads quickly and looks smooth
For more details, review the Add a Video to the Top of Your Website guide.
Add Your Logo to the Top of Your Website
Your logo helps visitors recognize your brand the moment they land on your website. Adding a clear, well-sized logo at the top of your site builds trust and keeps your branding consistent across devices.

Recommended Logo Dimensions
-
400 x 86 pixels
How to Add or Change Your Logo
-
Open your website editor by adding /admin to the end of your website address (e.g. www.yourwebsite.com/admin)
-
Click Website Settings
-
Click Template Options
-
Next to Header Logo, click Pick Image

-
Click Upload and select your logo file from your device
-
Click Insert
- Click Save
Logo Tips and Display Options
-
Horizontal, text-based logos display most clearly at this size
-
Square or stacked logos usually appear smaller and harder to read
-
Simple logos with fewer details stay sharp across devices
-
Make your logo appear larger:
-
From Website Settings, click Template Options
-
Set Enable Large Header Logo to True
-
For more details, review the Add Your Logo to the Top of Your Website guide.
Best Practices
Consistent visuals help your website feel polished and professional. Use these best practices to guide image, video, and logo choices across your site.
-
Choose visuals that reflect your local market and brand style
-
Avoid cluttered images or distracting motion
-
Test all visual updates on desktop and mobile devices
Troubleshooting
If your website visuals do not appear as expected, use these suggestions to identify and fix common issues.
-
If an image looks cropped, confirm it matches the recommended template dimensions and check how it displays on both desktop and mobile
-
If a video does not load or appears choppy, confirm the file is an MP4 and under 8 MB, then try compressing it again
-
If a logo looks blurry or too small, upload a logo closer to the recommended dimensions and adjust the logo display settings if needed
Frequently Asked Questions
What are the image requirements for the top of my website?
Header images should be JPG or PNG files and match your website template dimensions to prevent cropping or distortion.
What are the video requirements for the top of my website?
Header videos must be MP4 files and stay under 8 MB. Short, lightweight videos work best for fast loading and smooth playback.
What are the logo requirements for the top of my website?
Logos display best at 400 x 86 pixels. Horizontal, text-based logos are recommended, as square logos can appear smaller or harder to read.
Why do image and video sizes matter?
Correct sizing prevents cropping, improves load speed, and keeps your website looking professional.
Need Help?
-
Call us at 844-311-4969 (Mon–Fri, 8 AM–8 PM CST)
-
Email support@realgeeks.com
-
Visit Real Geeks University for free video courses
-
Join the Real Geeks Mastermind group on Facebook for peer tips and best practices
Related Articles
-
Add a Video the Top of Your Website